05 Jan 2019
To view a screencast of this post, visit https://www.youtube.com/watch?v=qFh8tirbXA8.
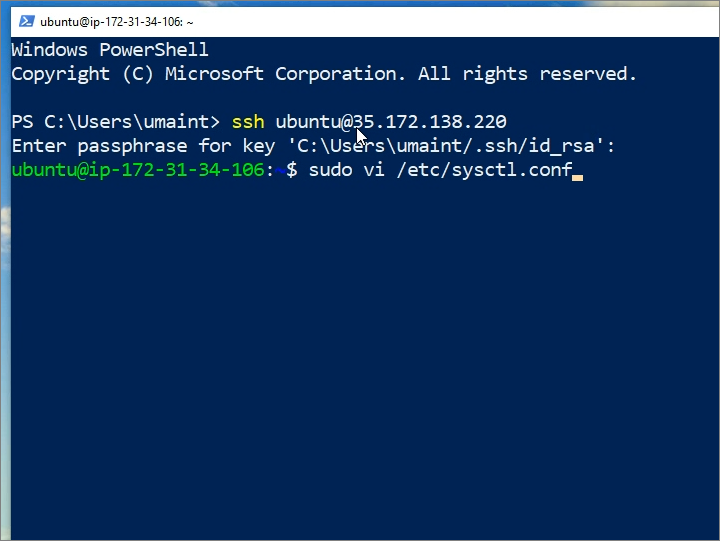
Start by right-clicking on the Windows start button, and selecting Windows PowerShell. In PowerShell, invoke the SSH feature:
ssh linuxuserid@your.server.ip.address
where linuxuserid is replaced by your actual Ubuntu Linux user id, and your.server.ip.address is replaced by your actual server IP address or hostname.
Once logged on to the server, edit the system control configuration file:
Add lines at the end to specify BBR congestion control:
net.core.default_qdisc=fq
net.ipv4.tcp_congestion_control=bbr
Write the system control configuration file to disk. Activate these changes:
Download the V2Ray automated installation script:
wget https://install.direct/go.sh
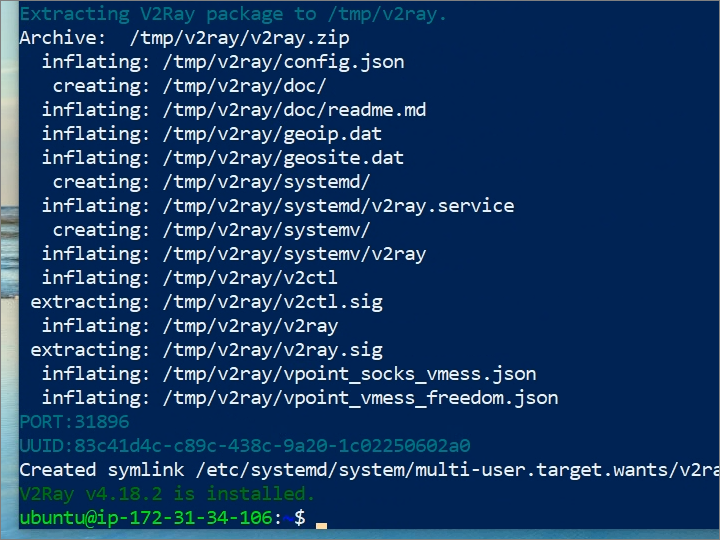
Execute the V2Ray installation script:
Note the generated server port and universally unique id (UUID).
Open the server firewall for the generated port number. For example, if your port number is 31896 and you have already installed iptables-persistent, you would put:
sudo iptables -vnL
sudo iptables -A INPUT -p tcp --dport 31896 -j ACCEPT
sudo iptables -vnL
sudo dpkg-reconfigure iptables-persistent
Start V2Ray server:
sudo systemctl enable v2ray
sudo systemctl start v2ray
Check that V2Ray server is working correctly:
sudo systemctl status v2ray
sudo netstat -tulpn
Exit your Windows PowerShell SSH session with the V2Ray server:
You can test the server by installing the V2RayN GUI client for V2Ray on a Windows PC. You will need to have made a note of the server address, server port, and universally unique id (UUID).
Open a browser and navigate to https://github.com/2dust/v2rayN/releases.
Download v2rayN-Core.zip, and extract the files from it.
Launch the application v2rayN.exe.
In the system tray, which is at the bottom right of your Windows desktop, open the V2RayN control panel.
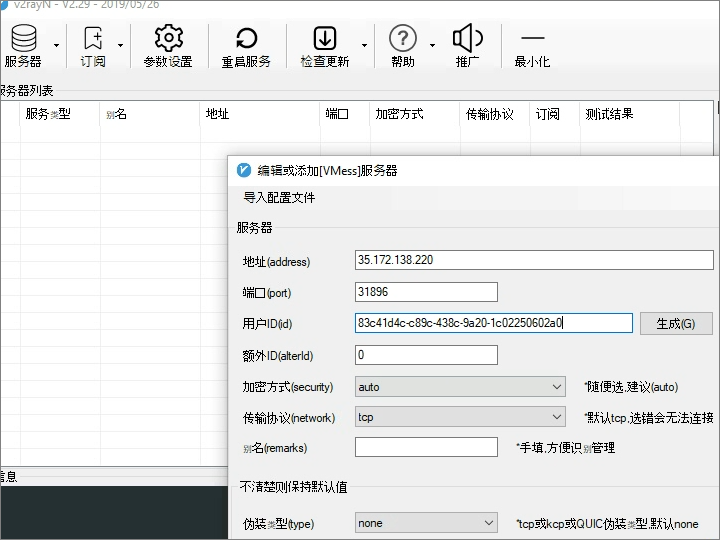
Select the menu bar item for Servers (服务器). Select the first option, which is the one for Add VMess server (添加VMess服务器).
Enter the values for:
- Server address (地址)
- Server port (端口)
- UUID (用户)
Click the Open (确定) button.
In Google Chrome, go to More Tools > Extensions > Open Chrome Web Store.
Search for SwitchyOmega by FelisCatus. Add this extension to Chrome.
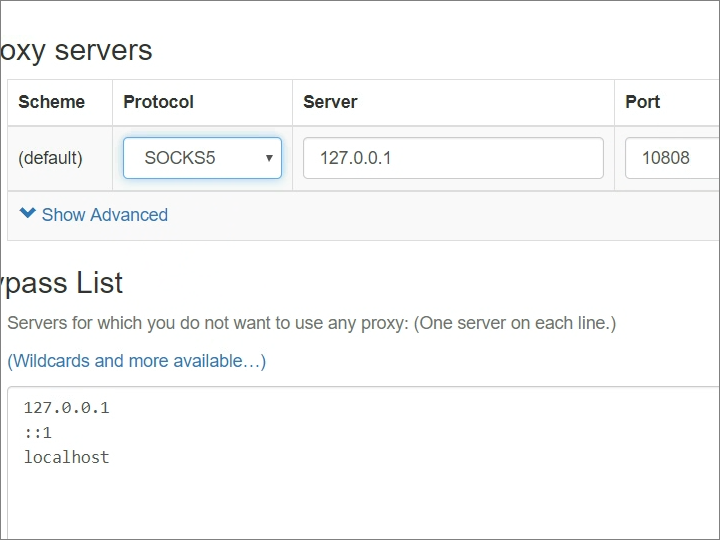
Set up the local proxy:
- The protocol should be SOCKS5
- The server should be
127.0.0.1
- The port should be
10808
In SwitchyOmega, turn on the proxy.
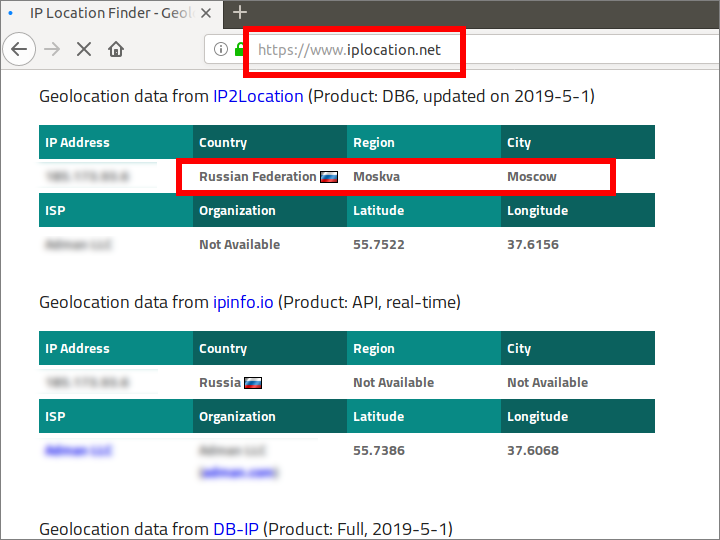
Check that everything is working by visiting https://www.iplocation.net
04 Jan 2019
For a screencast video of this post, see https://www.youtube.com/watch?v=dR0N6ynZOqM.
Following are some screenshots of installing V2Ray as a client on an Ubuntu Linux Desktop PC.
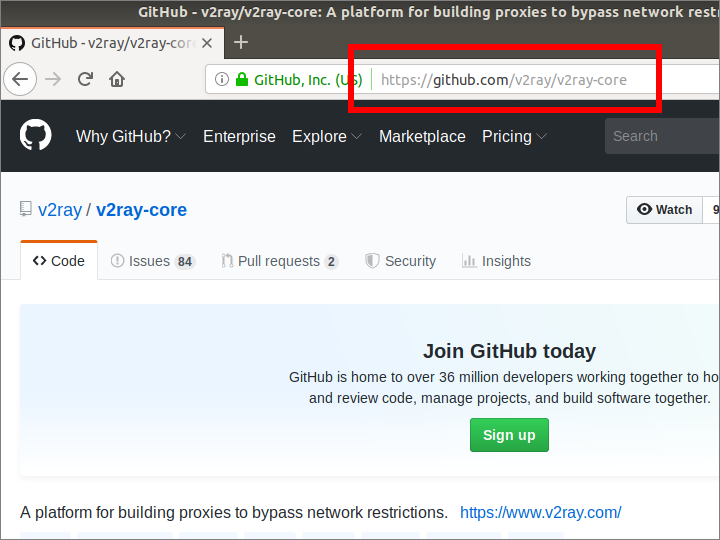
Open a browser and visit https://github.com/v2ray/v2ray-core.
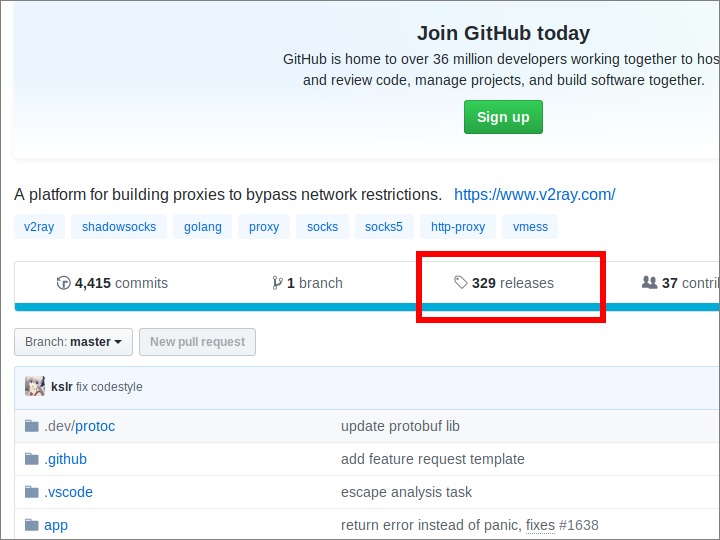
Click the releases button.
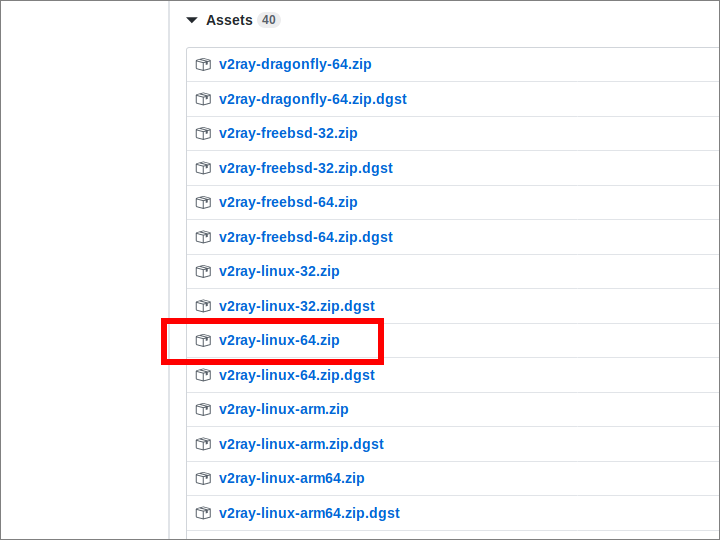
Assuming you have a 64-bit processor in your PC, look for v2ray-linux-64.zip.
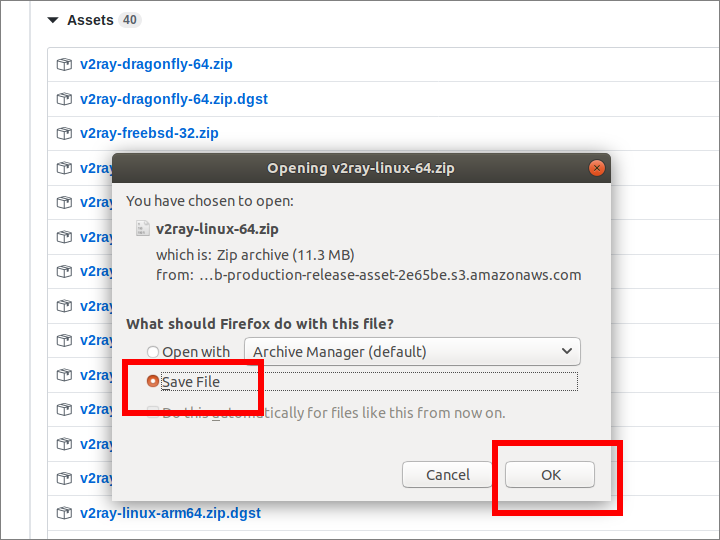
From your browser, save the file v2ray-linux-64.zip in your Downloads directory.
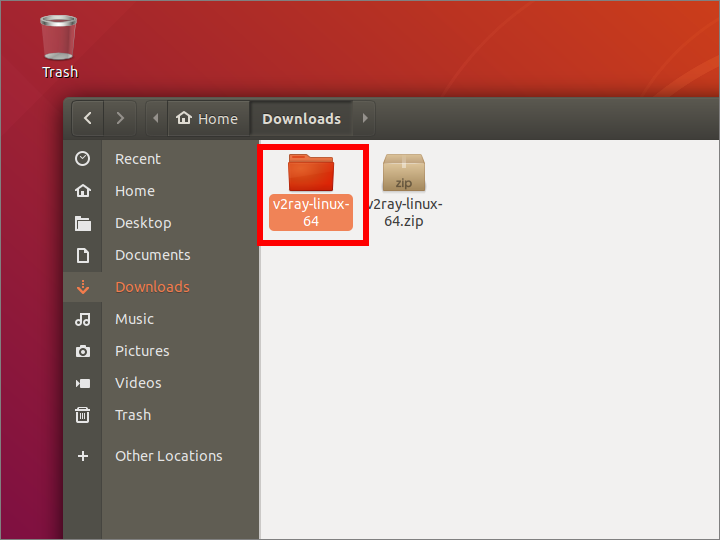
Extract the zip file.
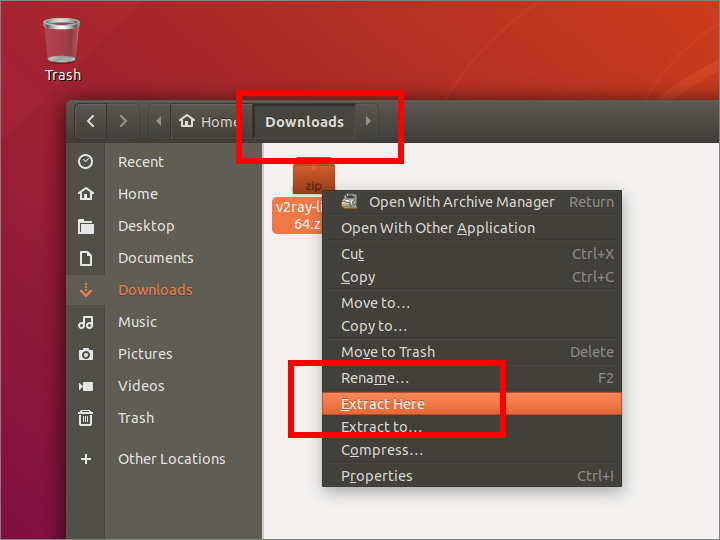
The contents of the zip file are extracted to a new directory named v2ray-linux-64.
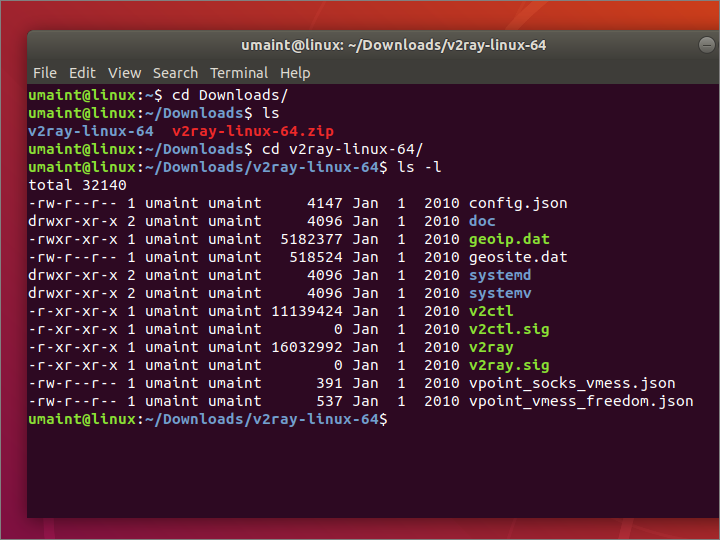
Open a terminal and list the contents of the v2ray-linux-64 directory.
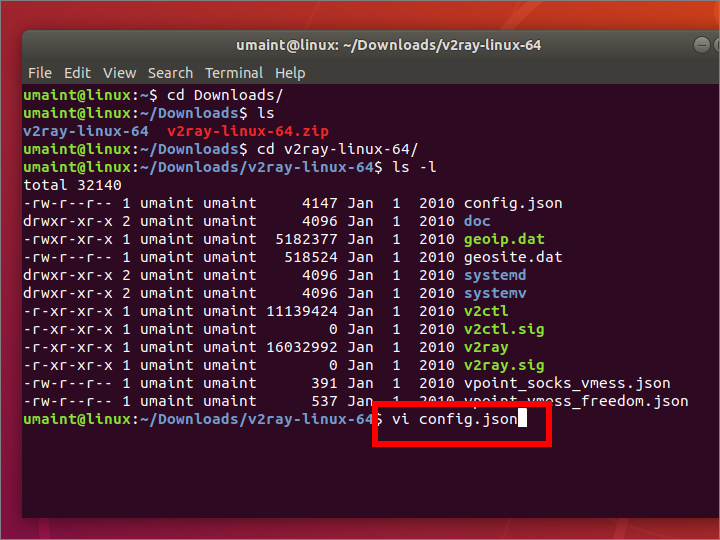
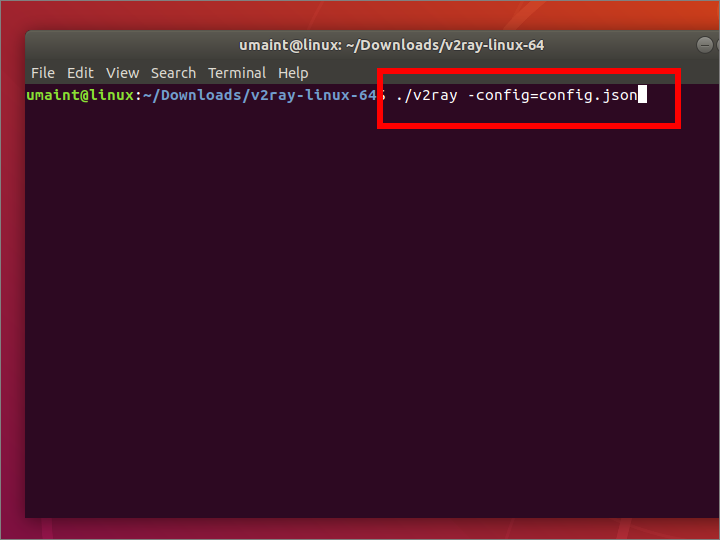
Edit the configuration file, which is named config.json.
Your contents will look something like this. IP address, port, and user id must match your server.
{
  "inbounds": [{
    "port": 10808,
    "listen": "127.0.0.1",
    "protocol": "socks",
    "settings": {
      "udp": true
    }
  }],
  "outbounds": [{
    "protocol": "vmess",
    "settings": {
      "vnext": [{
        "address": "YOUR.SERVER.IP.ADDRESS",
        "port": YOURPORT,
        "users": [{ "id": "YOUR-UNIVERSALLY-UNIQUE-ID" }]
      }]
    }
  },{
    "protocol": "freedom",
    "tag": "direct",
    "settings": {}
  }],
  "routing": {
    "domainStrategy": "IPOnDemand",
    "rules": [{
      "type": "field",
      "ip": ["geoip:private"],
      "outboundTag": "direct"
    }]
  }
}
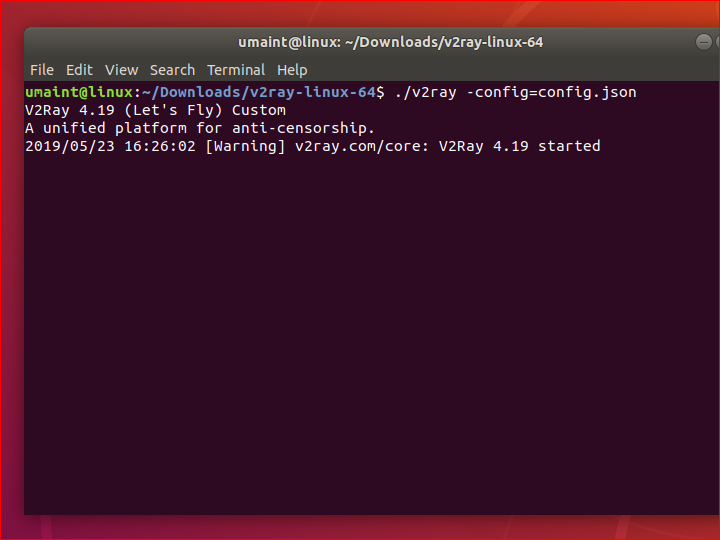
Execute the v2ray program with the config.json configuration file.
You see a message to say that V2Ray has started.
Open Firefox. Select the option for Network Settings. Choose manual proxy configuration, SOCKS Host 127.0.0.1, and SOCKS v5.
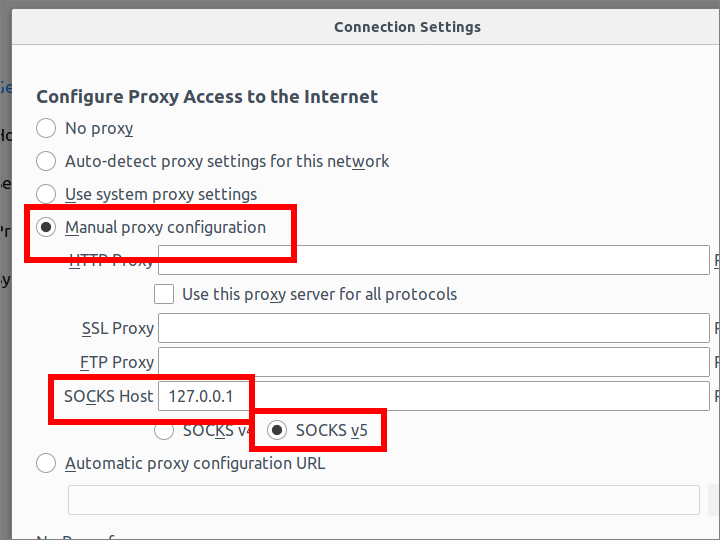
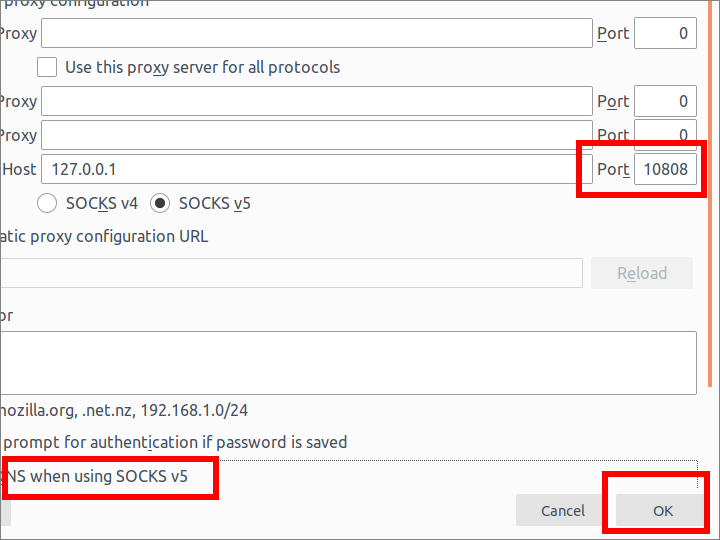
Choose port 10808 for your local port to communicate with the V2Ray client. Choose to proxy DNS when using SOCKS v5. Click OK to save these settings.
In your Firefox browser, check that your IP location now matches your server by visiting https://www.iplocation.net.
03 Jan 2019
This is for a local PC running Ubuntu Desktop 18.04 LTS.
Install Dependencies
Update the PC:
sudo apt update
sudo apt upgrade
Install prerequisites for development environment:
sudo apt install vim curl git zip unzip
Configure Git:
git config --global user.name "Your Name"
git config --global user.email your.email@example.com
git config --global push.default simple
Install MariaDB
Install packages:
sudo apt install mariadb-server
Secure MariaDB:
sudo mysql_secure_installation
- There is no current password for root, so press Enter
- Enter n to set root password, since we will use unix socket authentication for root
- Enter y to remove anonymous users
- Enter y to disallow root login remotely
- Enter y to remove test database and access to it
- Enter y to reload privilege tables now
Install PHP
Install PHP packages:
sudo apt install php-fpm php-mysql php-cli php-xml php-json php-mbstring php-tokenizer php-bcmath php-zip
Install Composer
Download the PHP composer installer script from https://getcomposer.org/installer:
cd ~/Downloads
php -r "copy('https://getcomposer.org/installer', 'composer-setup.php');"
Follow the instructions on https://getcomposer.org/download to check the file hash of the download. The value of the hash will vary from version to version, so you must get the latest value from https://getcomposer.org/download.
php -r "if (hash_file('sha384', 'composer-setup.php') === '48e3236262b34d30969dca3c37281b3b4bbe3221bda826ac6a9a62d6444cdb0dcd0615698a5cbe587c3f0fe57a54d8f5') { echo 'Installer verified'; } else { echo 'Installer corrupt'; unlink('composer-setup.php'); } echo PHP_EOL;"
You should see a message, “Installer verified”.
Run the composer installer script:
Delete the composer installer script:
php -r "unlink('composer-setup.php');"
Move composer.phar to a directory that is in your path and rename it to just composer:
sudo mv composer.phar /usr/local/bin/composer
Install Laravel
composer global require laravel/installer
Add ~/.composer/vendor/bin to your PATH:
Add a line at the end:
PATH="$HOME/.config/composer/vendor/bin:$PATH"
Log off and log on again to make this change effective.
Create New Laravel Project
cd ~
laravel new laratest2
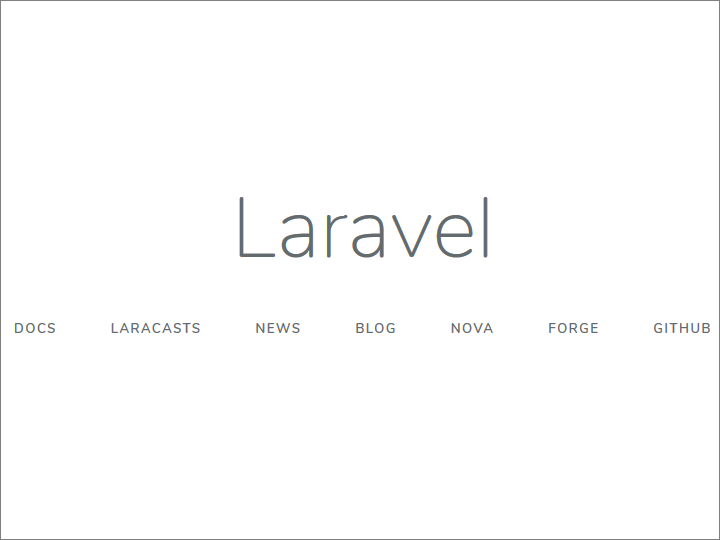
View the new Laravel project:
cd laratest2
php artisan serve
Open browser and visit http://127.0.0.1:8000.
Close the browser.
In the terminal, do Ctrl+c to shut down the development server.
Install Atom
Get Atom GPG Key:
cd ~/Downloads
wget -q -O- https://packagecloud.io/AtomEditor/atom/gpgkey | sudo apt-key add -
Add the Atom repository to your sources.list:
sudo add-apt-repository "deb [arch=amd64] https://packagecloud.io/AtomEditor/atom/any/ any main"
sudo apt update
Install Atom:
Close the terminal.
Create New Local Repository
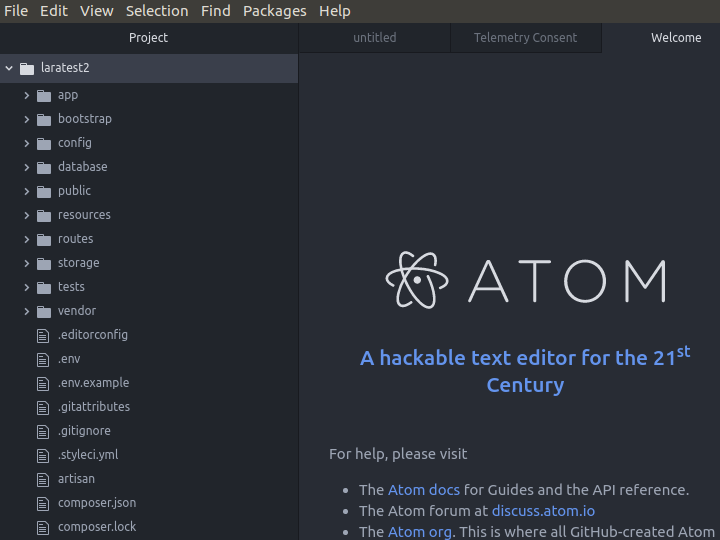
Open the Atom app.
Select Open a Project.
Open the laratest2 project.
Do Ctrl+9 top open the Git/Github panel.
Click on Create repository.
Click Init.
Click on Stage All.
Type the commit message Initial commit.
Click Create detached commit.
Create New Github Repository
Open a browser.
Create a new empty repository on Github. In this example it is named laratest2.
Note the instructions marked push an existing repository from the command line. They will read something like this:
git remote add origin https://github.com/umaint/laratest2.git
git push -u origin master
Now open a terminal (Ctrl+Alt+t).
cd ~/laratest2
git remote add origin https://github.com/umaint/laratest2.git
Push to Github
In your Atom window, you see a Github screen.
Click Login.
You are prompted to visit https://github.atom.io/login to obtain a token.
Click the button to Authorize atom.
You are given a token. It will be something like this 40-character hexadecimal string:
9b8924730123456789abcdef0123456789abcdef
Copy the token into your Atom Github panel.
Click Login.
Click Publish.
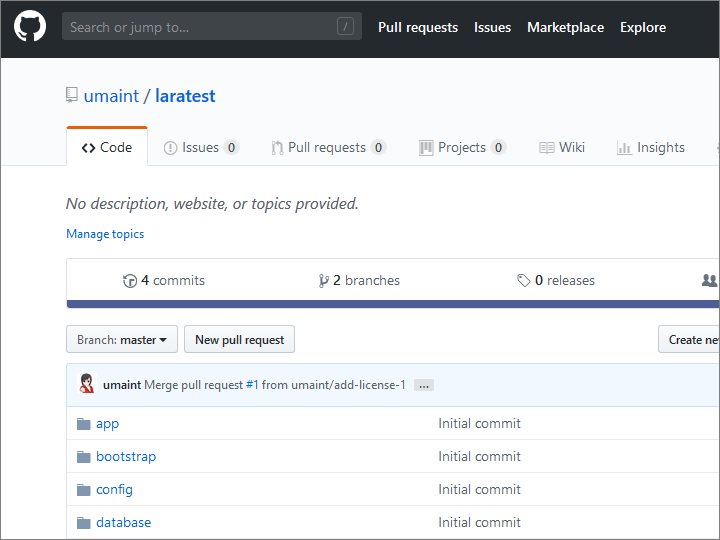
Now, in your browser, you see the laratest2 directories and files have been pushed to Github.
Add README.md and LICENSE
In your browser, on the Github page for your repository, click the Add a README button.
Click Commit new file.
For the LICENSE:
- Click Create new file and add to the repository a new file named
LICENSE.
- Click Choose a license template. Make a selection, e.g., MIT License.
- Click Review and submit.
- Click Commit new file.
- Click Create pull request.
- Click Merge pull request
- Click Confirm merge
Pull README.md and LICENSE
Pull the revised repository, with its README.md and LICENSE, down to your local PC.
Click Fetch.
Click Pull.
Your local repository now has the README.md and LICENSE files, and is synchronized with your Github repository.
02 Jan 2019
Here you create a development environment on an Ubuntu Server 18.04 LTS.
Install Nginx
Update system:
sudo apt update
sudo apt upgrade
Open ports TCP/80 and TCP/443 in firewall:
sudo iptables -A INPUT -p tcp --dport 80 -j ACCEPT
sudo iptables -A INPUT -p tcp --dport 443 -j ACCEPT
sudo apt install iptables-persistent
Install Nginx:
Edit default site definition:
sudo vi /etc/nginx/sites-available/default
Enter actual server name. For example:
server_name www.example.com;
Restart Nginx:
sudo systemctl restart nginx
Install Free SSL Certificate
Add personal package archive (PPA):
sudo add-apt-repository ppa:certbot/certbot
Press Enter to confirm addition.
Install packages:
sudo apt update
sudo apt upgrade
sudo apt install certbot python-certbot-nginx
Run Certbot:
- Enter email address
- Enter a for agree
- Enter y or n for email address sent to Electronic Frontier Foundation
- If a list of domain names appears, enter the number of your domain name from the list
- Enter 2 if you want to force HTTPS
Set up Certbot to do renewal every 90 days:
sudo certbot renew --dry-run
Open browser and do initial test of HTTPS version of website. You see message, “Welcome to nginx!”
Install MariaDB
Install packages:
sudo apt install mariadb-server
Secure MariaDB:
sudo mysql_secure_installation
- There is no current password for root, so press Enter
- Enter n to set root password, since we will use unix socket authentication for root
- Enter y to remove anonymous users
- Enter y to disallow root login remotely
- Enter y to remove test database and access to it
- Enter y to reload privilege tables now
Install PHP
Install basic PHP packages:
sudo apt install php-fpm php-mysql
Edit PHP initialization file:
sudo vi /etc/php/7.2/fpm/php.ini
Set default timezone:
Edit default site:
sudo vi /etc/nginx/sites-available/default
Add index.php as first possibility for index file:
index index.php index.html index.htm index.nginx-debian.html;
Uncomment PHP location block, and make sure unix socket file name corresponds to PHP version:
    location ~ \.php$ {
        include snippets/fastcgi-php.conf;
        fastcgi_pass unix:/var/run/php/php7.2-fpm.sock;
    }
Restart Nginx:
sudo systemctl restart nginx
Build test page:
sudo vi /var/www/html/index.php
Insert contents:
Test HTTPS index page. You see PHP info page.
Install Mail Server
First, add a DNS A record pointing to your server, e.g. smtp.example.com points to IP address 3.4.5.6.
Second, add a DNS MX record pointing to e.g. smtp.example.com with priority 10.
Third, set up Sender Policy Framework (SPF) for your domain by adding a DNS TXT record. The name of the entry is the naked domain. (Some DNS services use a blank, while others use a commercial-at sign for this.) The value of the text field is:
This specifies that you will allow the domain’s MX server(s) to send email for the domain, but you want to prohibit all other servers from sending email on your behalf.
Open the firewall to allow mail in on port 25:
sudo iptables -A INPUT -p tcp --dport 25 -j ACCEPT
sudo dpkg-reconfigure iptables-persistent
Install mutt and postfix:
sudo apt install mutt postfix
During the installation, the Postfix Configuration screen appears, informing you of the possible types of Postfix mail server you can have. Tab to Ok and press Enter. On the next screen, the actual choices appear. An Internet Site (which can both send and receive email directly using SMTP) is the default. Tab to Ok and press Enter. On the next screen, you are asked to enter your domain name. This will be your domain name, e.g. example.com. Enter your domain name, tab to Ok, and press Enter.
Edit the main Postfix configuration file:
sudo vi /etc/postfix/main.cf
Change the line for myhostname to match your actual hostname. For example:
myhostname = smtp.example.com
Duplicate the first three lines for smtpd (incoming) TLS configuration, then change the copied lines so that they specify smtp (outgoing) TLS:
smtp_tls_cert_file=/etc/ssl/certs/ssl-cert-snakeoil.pem
smtp_tls_key_file=/etc/ssl/private/ssl-cert-snakeoil.key
smtp_use_tls=yes
Also add a line at the end of the file that reads:
Write the file to disk, and quit the editor.
Now that everything is ready, restart Postfix:
sudo systemctl restart postfix
Edit your personal Mutt configuration file, using either the vi editor or the vi editor, as you prefer:
Here is a Mutt configuration file you can use to get started (and which you can change as you learn more about Mutt):
set mbox_type=Maildir
set folder="~/Maildir"
set mask="!^\\.[^.]"
set mbox="~/Maildir"
set spoolfile="~/Maildir"
set sort=reverse-date-received
set sort_aux=reverse-date-received
set editor='vi'
Write the file to disk.
Make an initial Maildir directory for yourself:
Edit the Mutt global colors file:
sudo vi /etc/Muttrc.d/colors.rc
Replace every occurrence of black by default to improve the appearance of Mutt.
Write the file to disk, and quit the editor.
You can now invoke Mutt for an initial test with the command:
Since there is no mail as yet, you will get a message, /home/ubuntu/Maildir is not a mailbox. This is just a warning.
Visit https://mxtoolbox.com to test your mail server set up.
Install PHP Composer, NodeJS, and NPM
Install prerequisites:
sudo apt install curl git zip unzip
sudo apt install php-cli php-xml php-json php-mbstring php-tokenizer php-bcmath php-zip
Install PHP composer:
cd ~
curl -sS https://getcomposer.org/installer -o composer-setup.php
sudo php composer-setup.php --install-dir=/usr/local/bin --filename=composer
sudo chown -R ubuntu:ubuntu .composer
Install NodeJS and NPM:
curl -sL https://deb.nodesource.com/setup_10.x | sudo -E bash -
sudo apt install nodejs
node -v
npm -v
Install Laravel
composer global require laravel/installer
Add /home/ubuntu/.composer/vendor/bin to your PATH, where ubuntu is your user name on the Ubuntu server.
Add a line at the end:
PATH="$HOME/.composer/vendor/bin:$PATH"
Log off and log on again to make this change effective.
Create New Laravel Project
cd ~
laravel new repo-name
Edit Nginx default site:
sudo vi /etc/nginx/sites-available/default
Change Nginx webroot to /home/ubuntu/repo-name/public, where ubuntu is your user name on the Ubuntu server:
root /home/ubuntu/repo-name/public;
Insert index.php into URLS:
try_files $uri $uri/ /index.php?$query_string;
Write Nginx default configuration to disk.
Restart Nginx:
sudo systemctl restart nginx
Copy the the sample environment variable file to its final destination:
cd repo-name
cp .env.example .env
Generate an app encryption key:
Edit the environment file:
Set value for APP_URL. For example:
APP_URL=https://www.example.com
Write the environment variable file to disk.
Change owner to web server:
sudo chown -R www-data:www-data storage
where ubuntu is your user name on the Ubuntu server.
Test
Test access to site. If there are errors:
sudo tail /var/log/nginx/error.log
01 Jan 2019
Here you create a new Github repository and a matching local Git repository.
Install Git
git config --global user.name "Your Name"
git config --global user.email your.email@example.com
git config --global push.default simple
Create New Github Repository
Create a new empty repository on Github. In this example it is named repo-name.
Create New Local Directory
If the directory does not yet exist locally, then create it now:
Change into the local directory:
Add README
Start a README in markdown format:
touch README.md
echo "# repo-name" > README.md
Commit Local Changes
git init
git add .
git commit -m "Initial commit"
Push Local to Github
git remote add origin https://github.com/user-name/repo-name.git
git push -u origin master
Add LICENSE
On Github, add to the repository a new file named LICENSE. Select the license type you want to add. This method create a Pull Request, which you must then accept and merge into your repository.
Pull LICENSE
Pull the revised repository, with its license, down to your VPS: